Mastering Charles Proxy:What is it and how to use it
Mastering Charles Proxy: What is it and how to use it
Charles Proxy, also known as Charles, is a web debugging proxy application used by developers to view all of the HTTP and SSL/HTTPS traffic between their machine and the internet. This includes requests, responses, and the HTTP headers.
In this blog we will discuss what is Charles Proxy and why we need this tool for our testing process. You will find how to download and install Charles Proxy, and how to configure SSL certificate settings and proxy settings in detail. We will also examine the configuration of proxy and certificate settings for mobile devices and web browsers step by step.
Although the installation of Charles is a bit difficult, it is worth a try as it is very simple to use and facilitates the testing process. If you proceed carefully step by step with SSL certificate processes and proxy settings, there will be no problem. There are also notes for solving some problems I encountered during application installation and mobile device proxy and certificate settings.
Why do we need the Charles Proxy tool for our testing process?
It is very important to make data and environment manipulations in our tests. Using a tool with a simple interface and a lot of functionality provides comfort in terms of time savings and efficiency. Instead of creating all the parameters and endpoints in the service content one by one, being able to easily see and edit the parameters in the content of the services triggered through the application helps ease of use. In this case, Charles provides great convenience in performing data manipulation for our tests.
We can easily control and edit the contents of our services which are triggered by the client side, and we perform data manipulation in a fast and flexible way. We use Charles because it’s a very powerful tool for debugging and testing apps. By recording and viewing data sent and received by our mobile apps or websites, we gain the visibility we need to reliably diagnose and fix problems and validate our work.
What is the Charles Proxy?
Charles Proxy is fantastic, a cross-platform HTTP/HTTPS debugging proxy server application, probably the most user-friendly of its genre. Its initial setup is painless, and it can be configured trough a nice user interface. It allows you to trace the origin and path of information transmitted over a network, which can be useful for debugging or testing purposes. It is compatible with Windows, Mac OS, and Linux operating systems, making it accessible to users on various platforms.
In general, these man-in-the-middle apps can be used in many cases, including:
- Capture and inspect HTTP/HTTPS traffic in plain text.
- Observing or analyzing HTTP(s) Requests and Responses.
- Sharing HTTP(s) Requests and Responses.
- Able to capture traffic from iOS physical devices (iPhone, iPad, AppleWatch, etc), iOS Simulators, Android physical devices, and Android Emulators.
- Easily Manipulating HTTP(s) Requests and Responses data with built-in tools, such as Map Local, Map Remote, Breakpoint, Scripting, …

Charles Proxy Setup
You can download Charles Proxy’s latest version from the https://www.charlesproxy.com/download/latest-release/ address and install the application.

Charles’ unlicensed version is available in half-hour periods, and you have to restart Charles after using it for half an hour. License information obtained from the administrator is entered into the Help-Register to Charles menu, and the licensed version is started to be used.
Go to the Help Register menu and enter the license info and password.

What is an SSL certificate and how do you install it?
SSL certificates help keep online interactions private and assure users that the website is authentic and safe to share private information with. If a website asks users to sign in, enter personal details such as credit card numbers, or view confidential information such as health benefits or financial information, it is essential to keep the data confidential.
Charles Certificate settings for MacOS
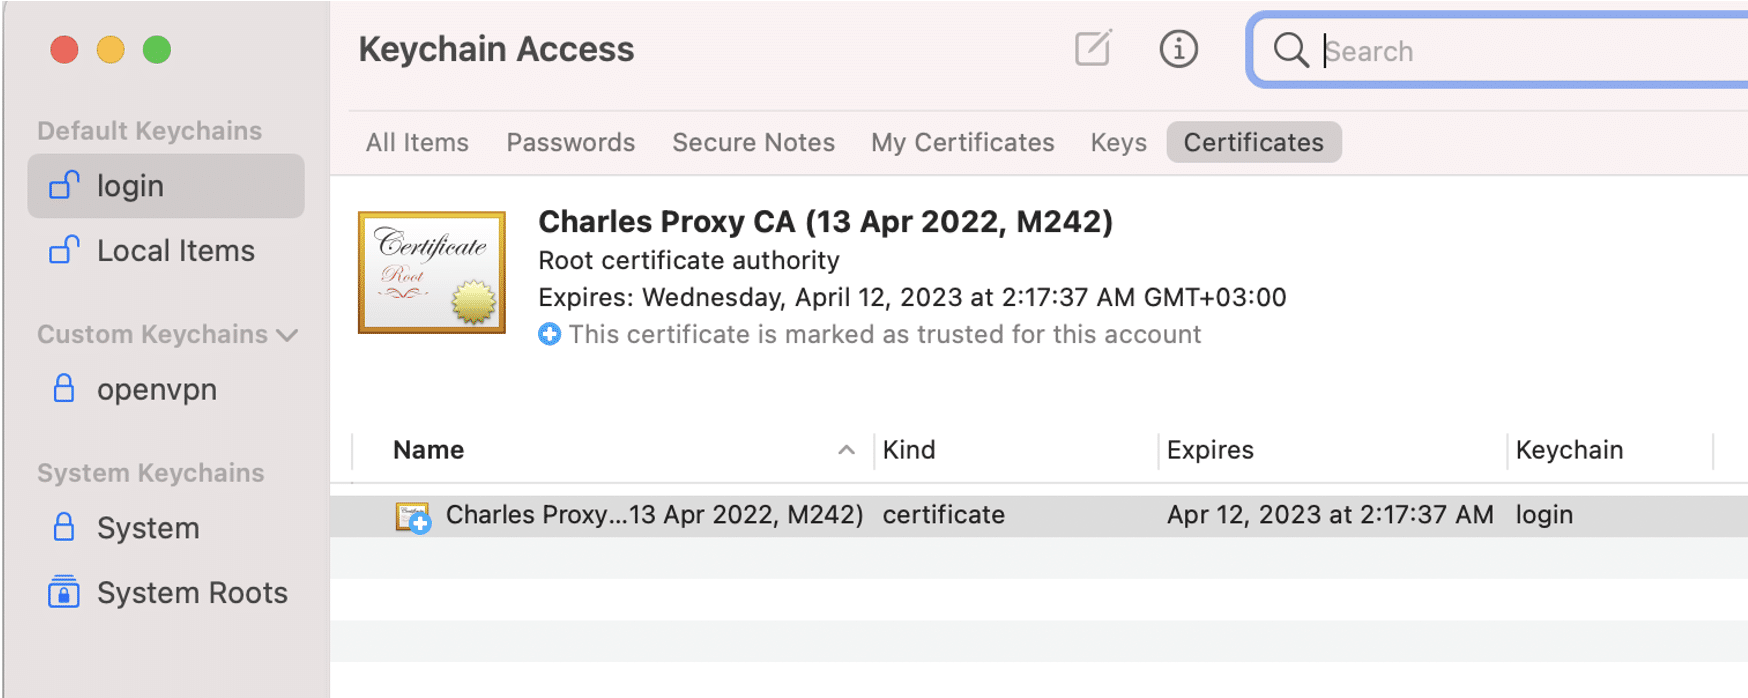
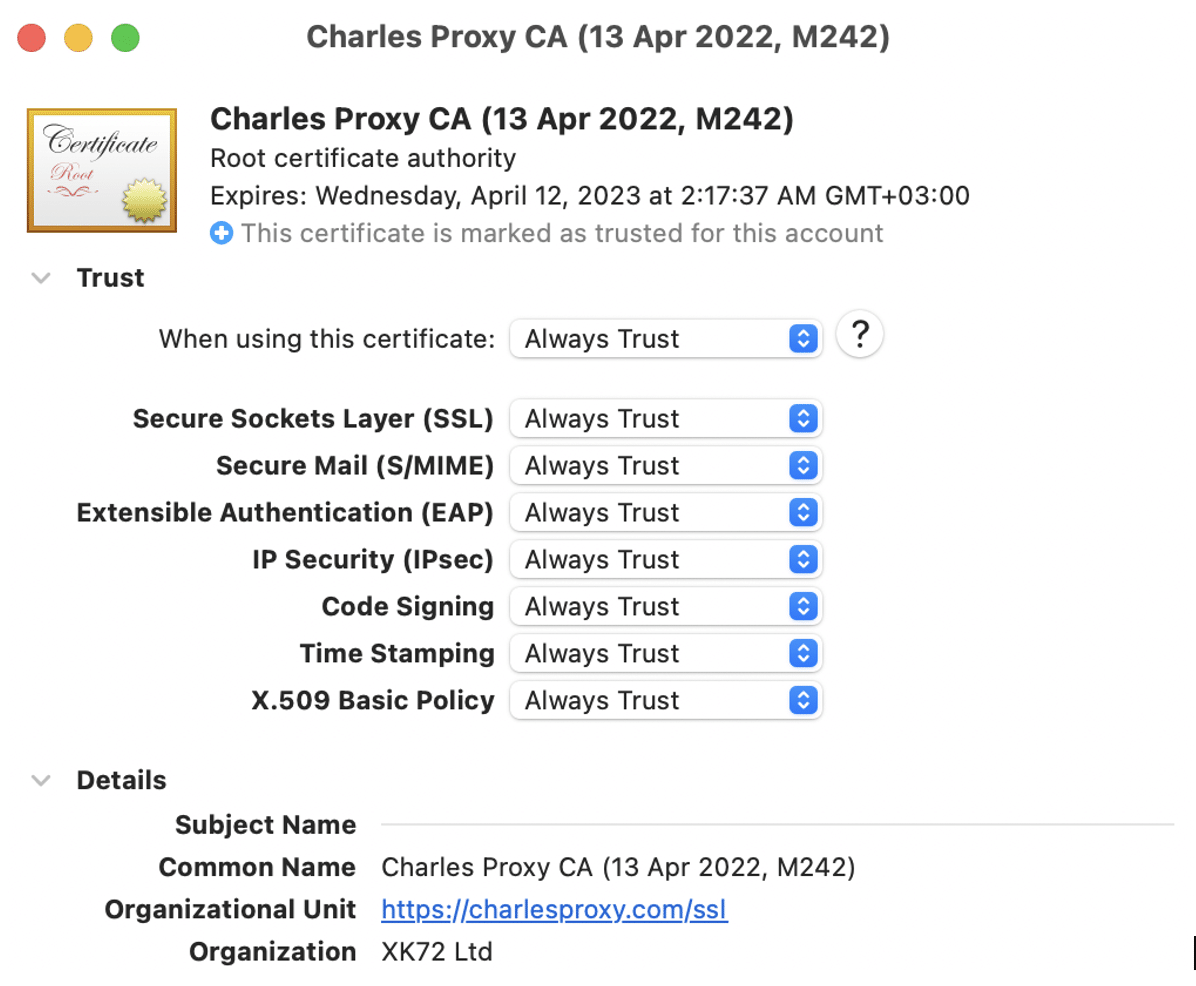
Charles Proxy certificate should be visible in the keychain as below. Control it from Help-> SSL Proxying-> Install Charles Root certificate menu. Find the “Charles Proxy…” entry in All items and double-click to get info on it. Expand the “Trust” section, and besides “When using this certificate” change it from “Use System Defaults” to “Always Trust”. Then close the certificate info window, and you will be prompted for your Administrator password to update the system trust settings.
Proxy Settings
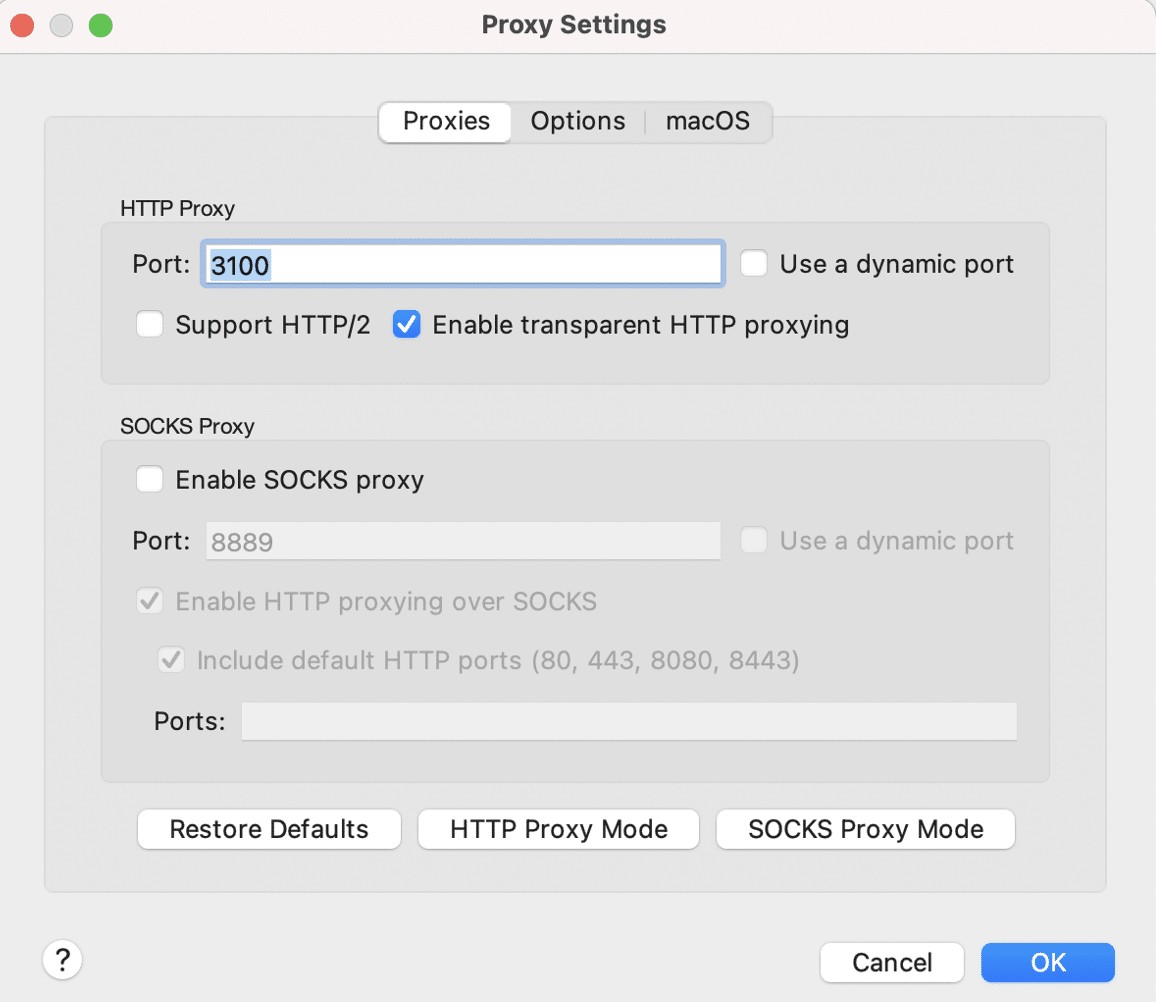
- Go to proxy settings with Proxy -> Proxy Settings menu.
- The port should be as 3100 and Enable transparent HTTP proxying should be selected.
- Change the default 8888 value to 3100.
- The use of external proxy servers should be unchecked.
- Go To External Proxy Settings under Proxy menu and check Use external proxy servers.

- When Enable SSL Proxying is not selected, services display as encrypted.
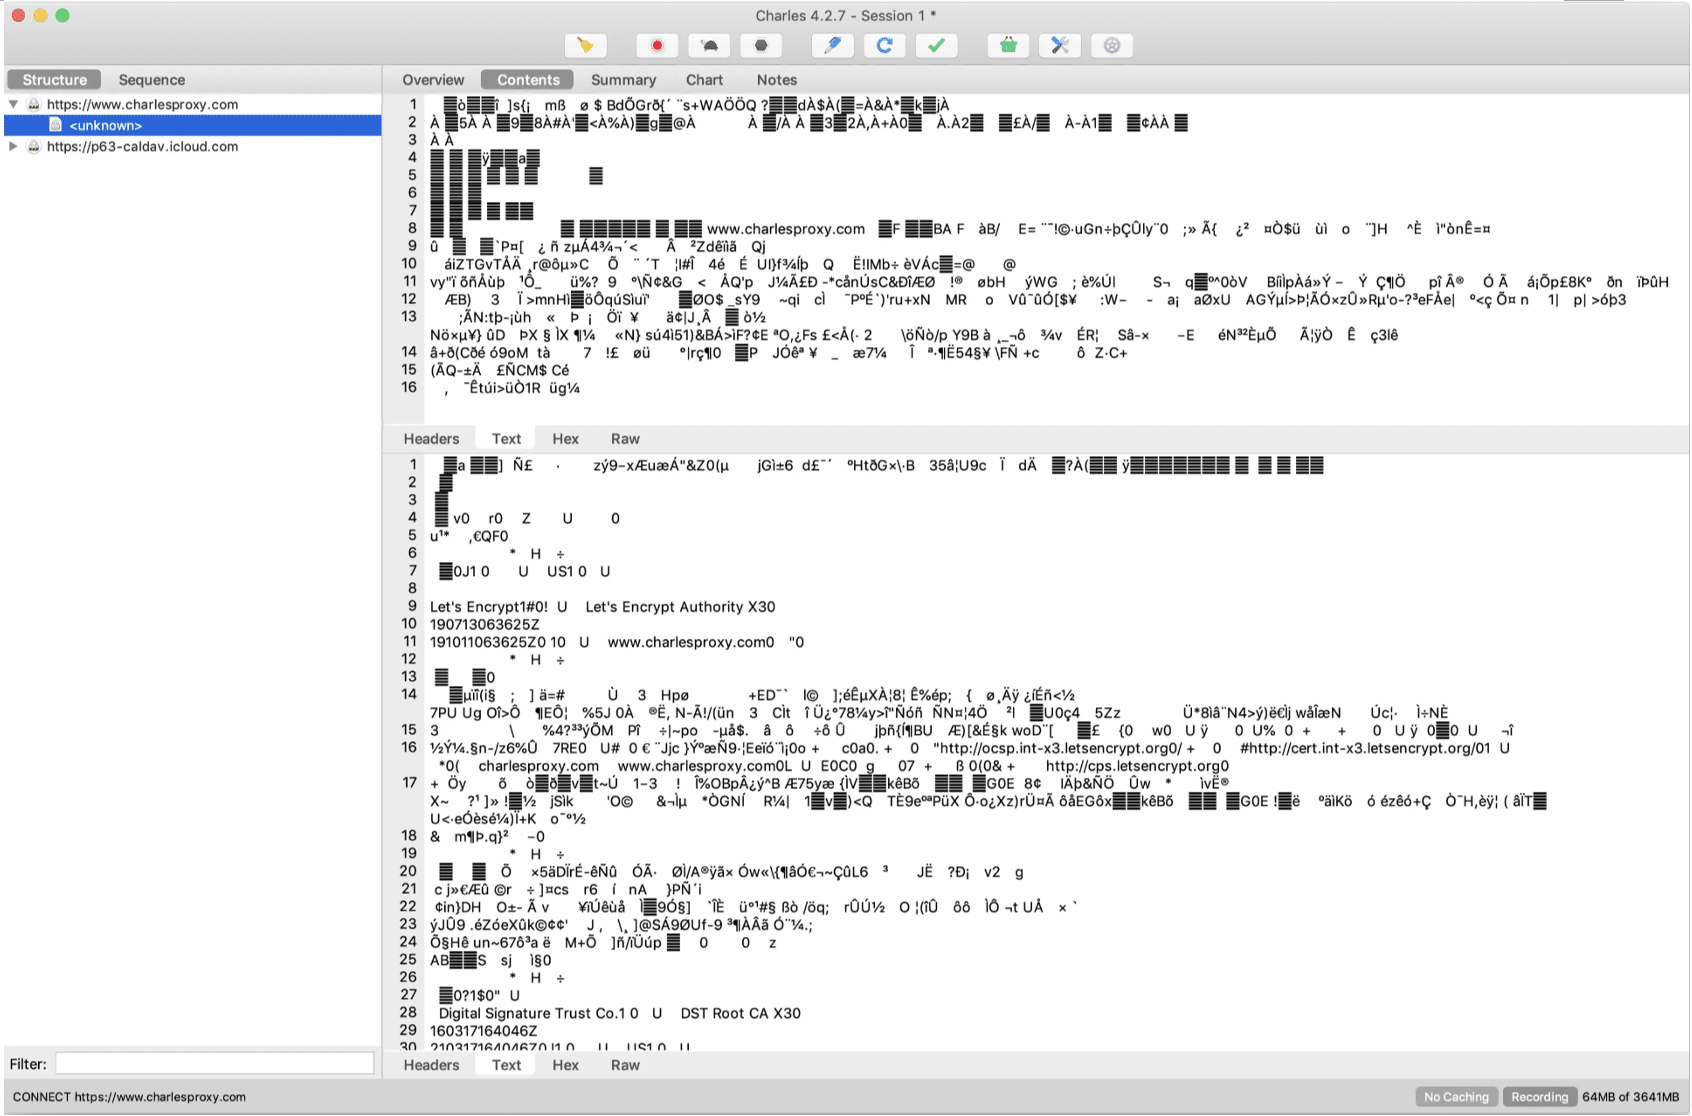
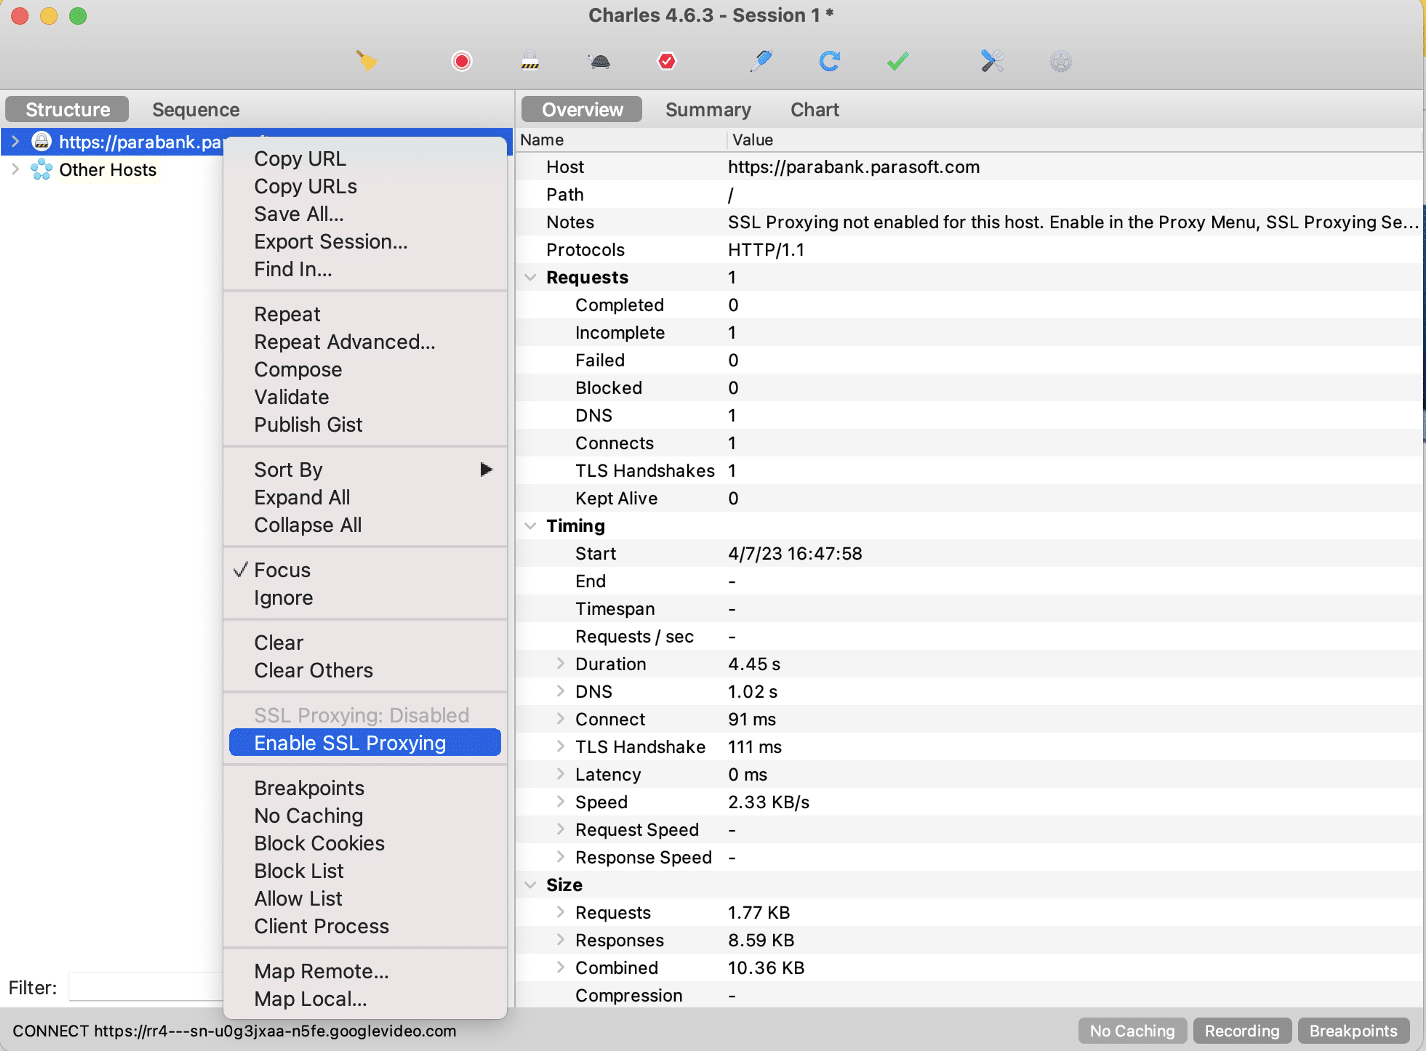
- Right Click on the service and tap on Enable SSL Proxying.
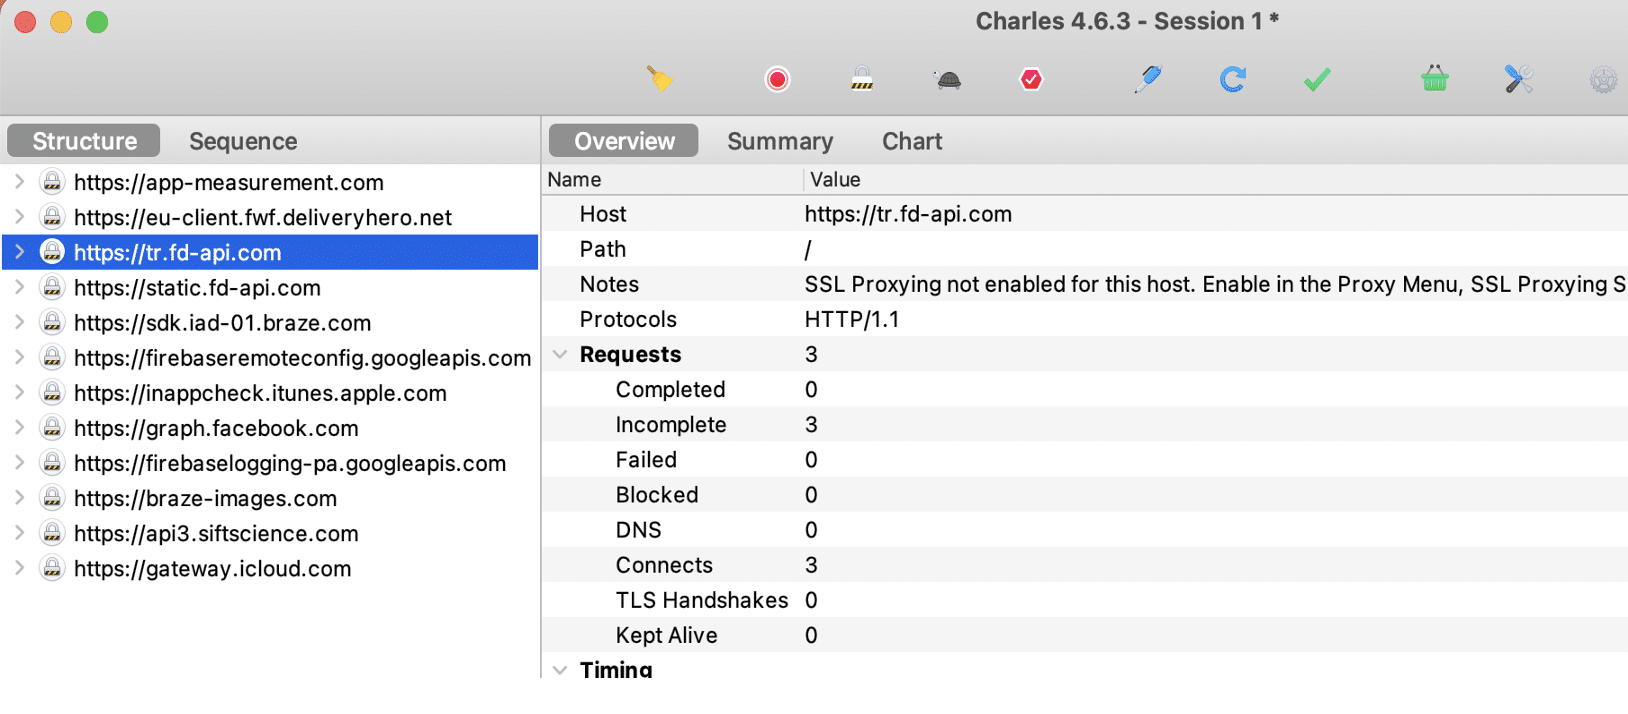
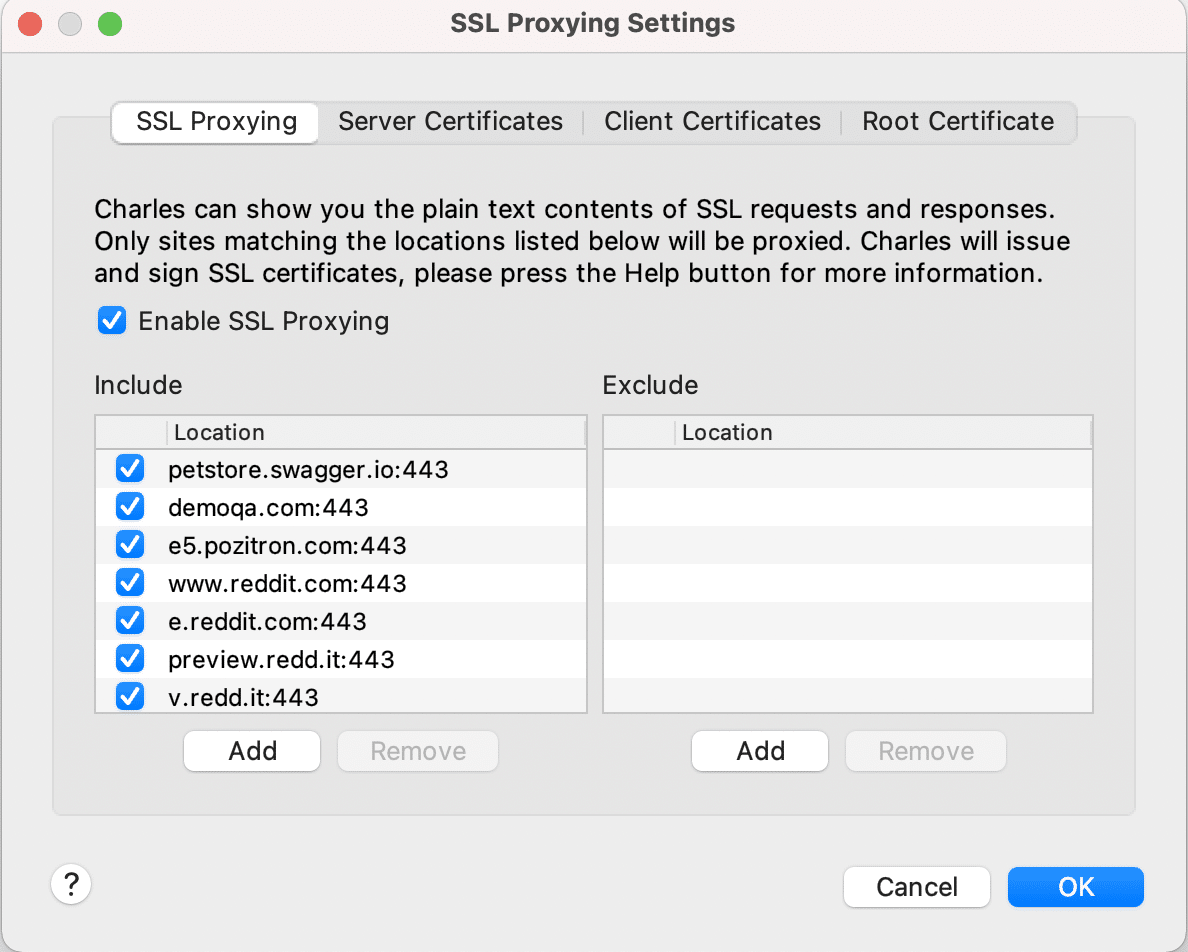
- Add SSL Proxy Settings “*” below under Proxy -> SSL Proxy Settings. So, services are added to this field automatically when Enable SSL Proxy is selected.
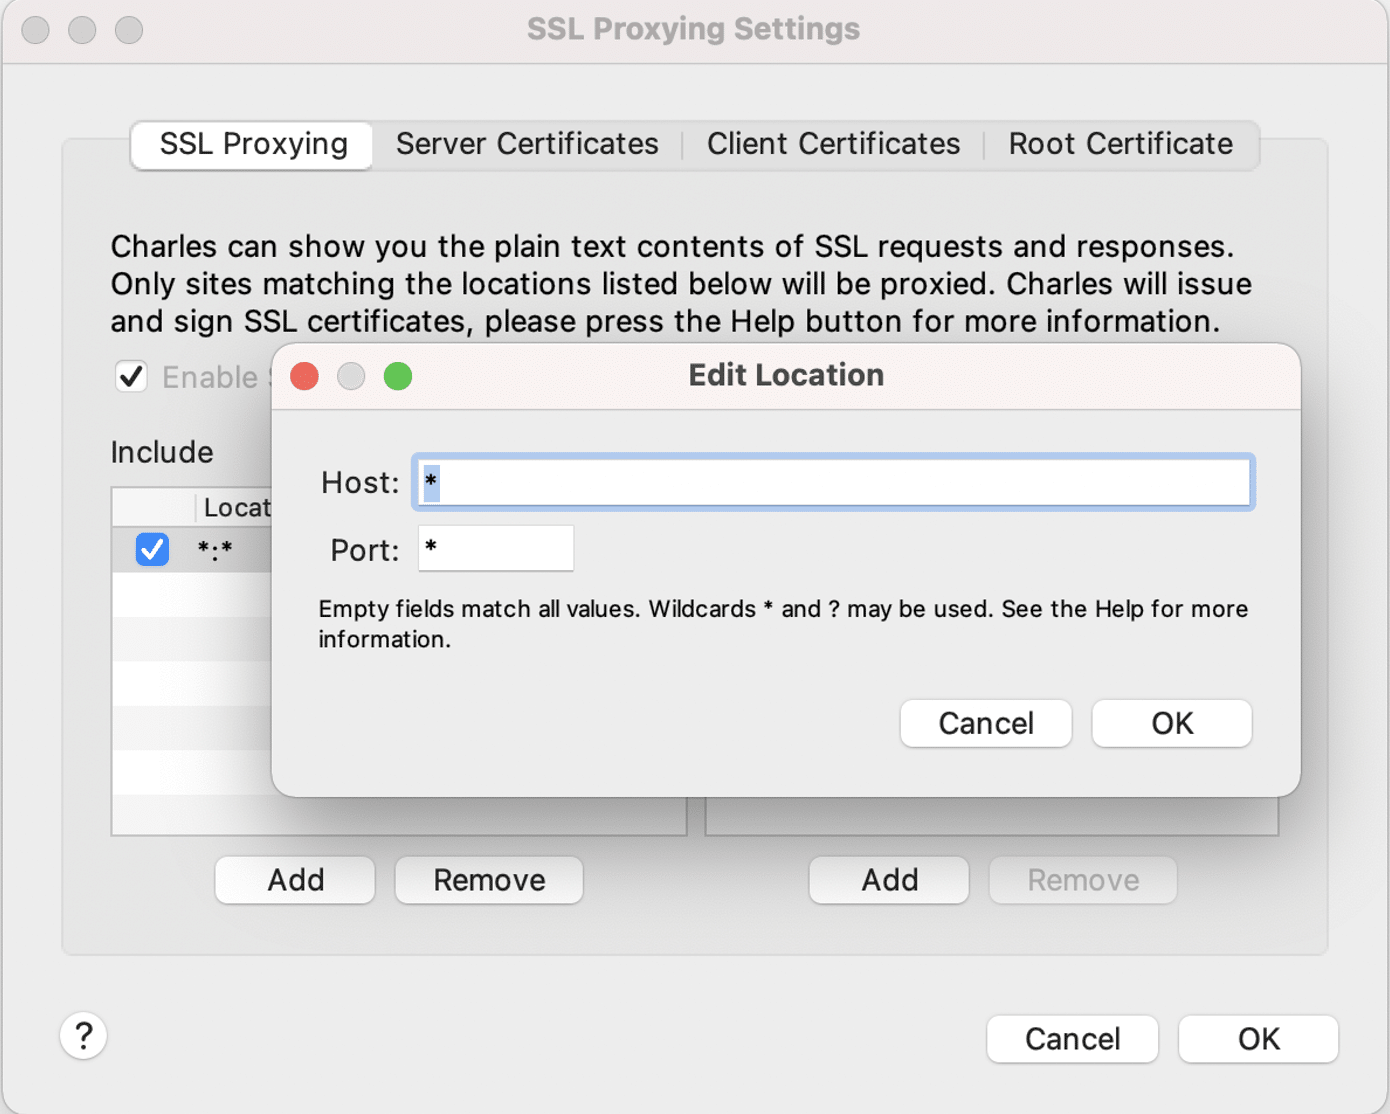
- When Enable SSL Proxy is selected and the service is not automatically added to this field, it can be added manually with the Add button.
Charles Certificate settings on the mobile side
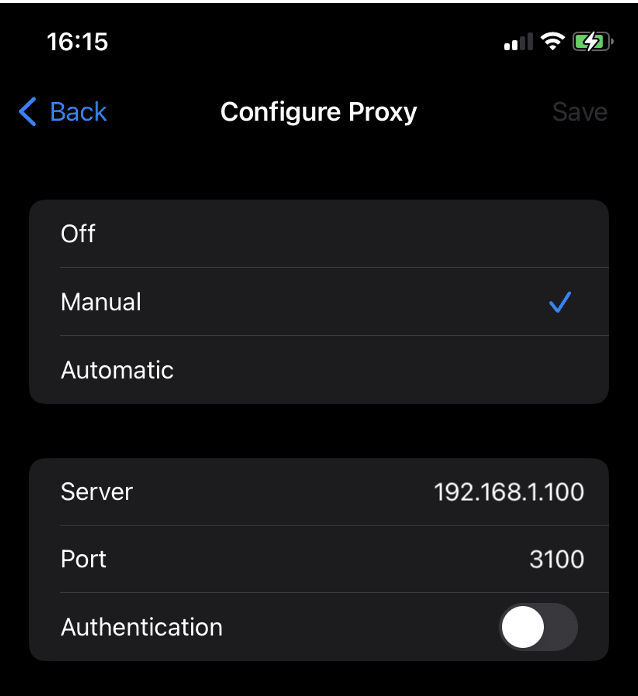
- On your mobile device, go to Settings -> Wi-Fi Information -> Configure a proxy.
- Change proxy configuration to Manual.
- PS: The same Wi-Fi network must be used on the computer and mobile device.
- Enter the IP Address (You can find it on Charles under Help -> Local IP Address) and the default port that Charles Proxy listens to is 8888. Set this port to 3100.
- And also, you can find it at Charles->Help->SSL Proxy->Install Charles Root Certificate on a Mobile Device or Remote Browser.

Mobile side should be as below:
IOS Certificate Settings
- For SSL Proxying while your Charles proxy is running on your computer, install your mobile device Charles proxy SSL certificate to see HTTPS connection requests and responses.
- Open any browser on the mobile device and search by pasting the http://chls.pro/ssl URL.
- Click on the Allow button in the confirmation pop-up for the certificate to be downloaded.


PS: If it does not open, the proxy is turned off and tried. If it is already downloaded, it does not take any action. Checked in the files-downloads folder.
- Click on the downloaded certificate, otherwise, it will not appear in the settings for the corresponding profile installation.
- After installation,
- Go to Settings->General->VPN And Device Management and open the downloaded Charles certificate.
- Should display as:

- Install the certificate. Then the profile will be observed as Verified.

- Check that the downloaded certificate is visible on the Certificate Trust Settings. Settings->General->About->Certificate Trust Settings. Then change it to enable.
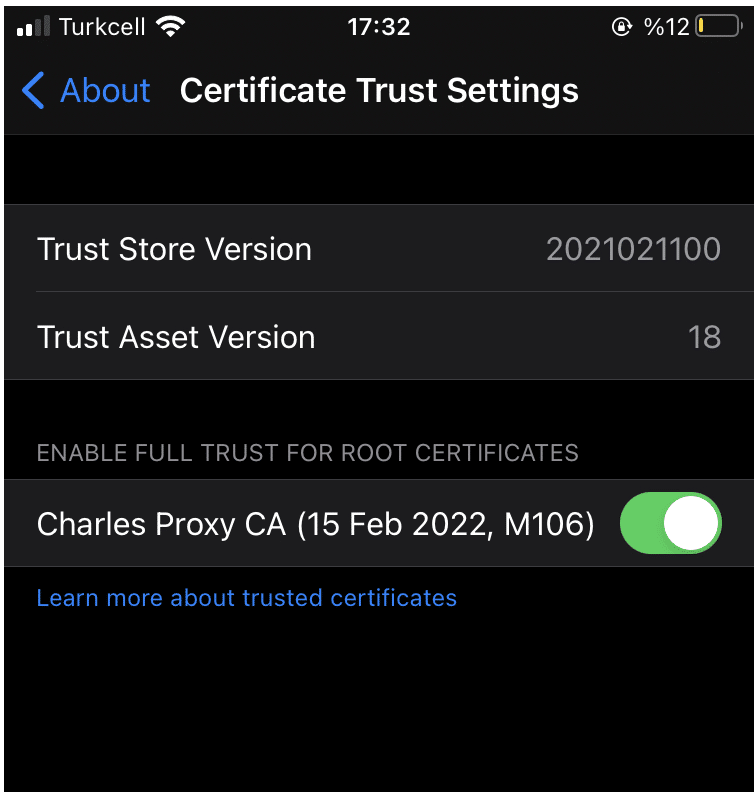
PS: After 1 year, you may need to remove and reinstall the certificate. If the certificate has expired and cannot be used on a mobile device, you can renew the certificate by selecting Reset Charles Root Certificate from the Help-SSL Proxying menu and installing again.
After all these settings are completed Charles and the mobile device is connected to the same proxy, and a pop-up message will open in Charles. Click the allow button in the dialog.

- Now your iOS device will be connecting to the internet through your laptop on the port that Charles is monitoring.
- All your network requests from your iOS device will be viewable in your Charles window.
PS: In Android, after the certificate is downloaded through the browser and the proxy settings are completed, it can be used easily as the same way with IOS.
Using Charles in Chrome browser with SwitchyOmega
- SwitchyOmega is a modern version of the “Proxy Settings” dialog, designed to be simpler, quicker, and more powerful, specially optimized for Chrome.
- After adding SwitchyOmega as a Chrome extension, open it from Extensions, click on options, click on a new profile, and create a Charles profile.
- IP and port information taken from Charles is entered into the Server and port fields in the created profile. Save with Apply Changes button.
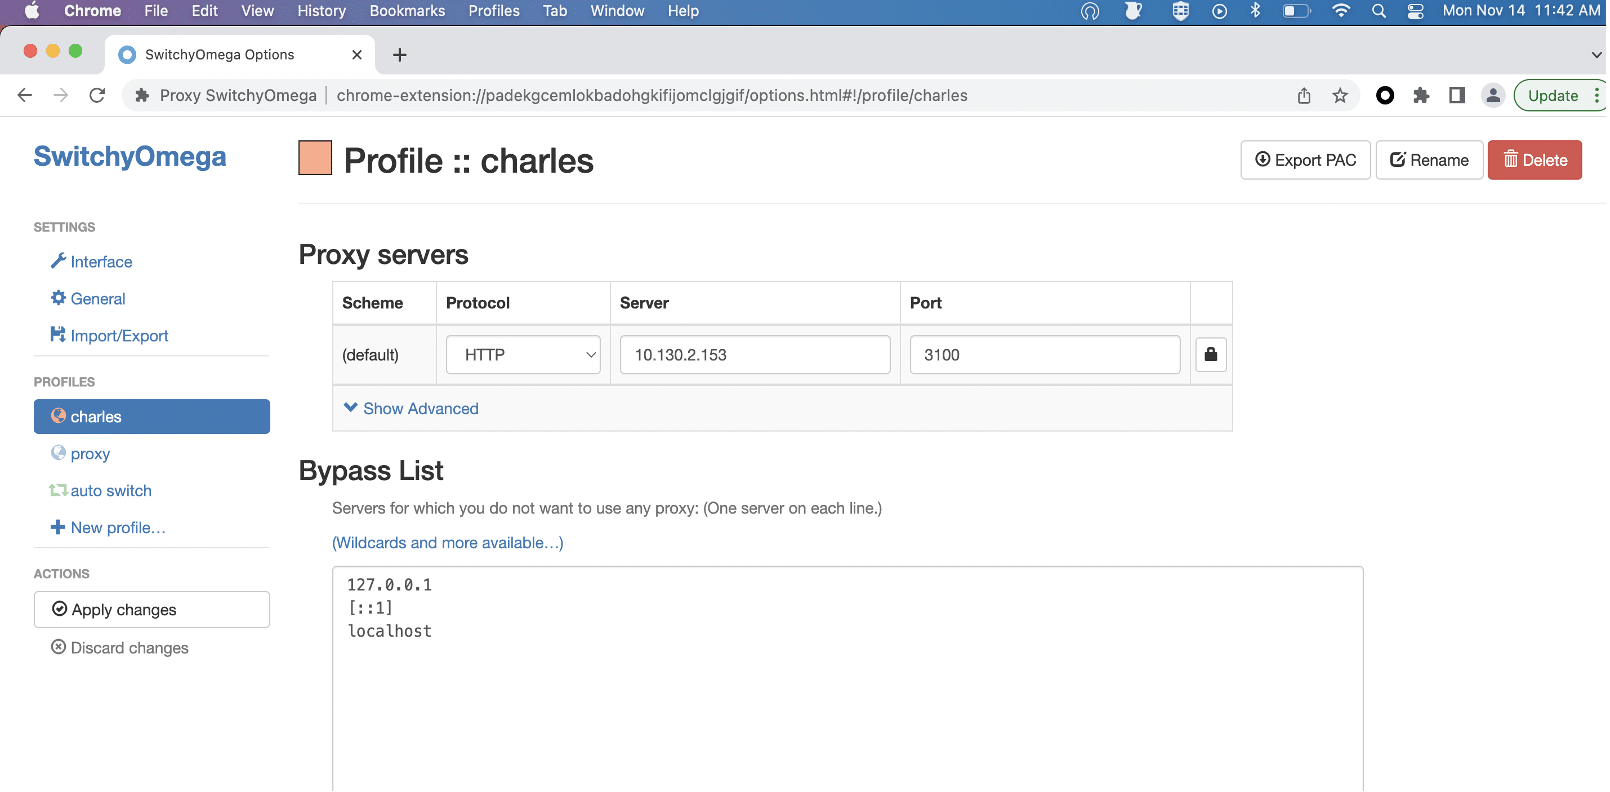
After synchronizing the proxies of Charles and Chrome via SwitchyOmega, checked that the MacOS proxy was opened. The MacOS proxy must be turned on when testing the website as below.
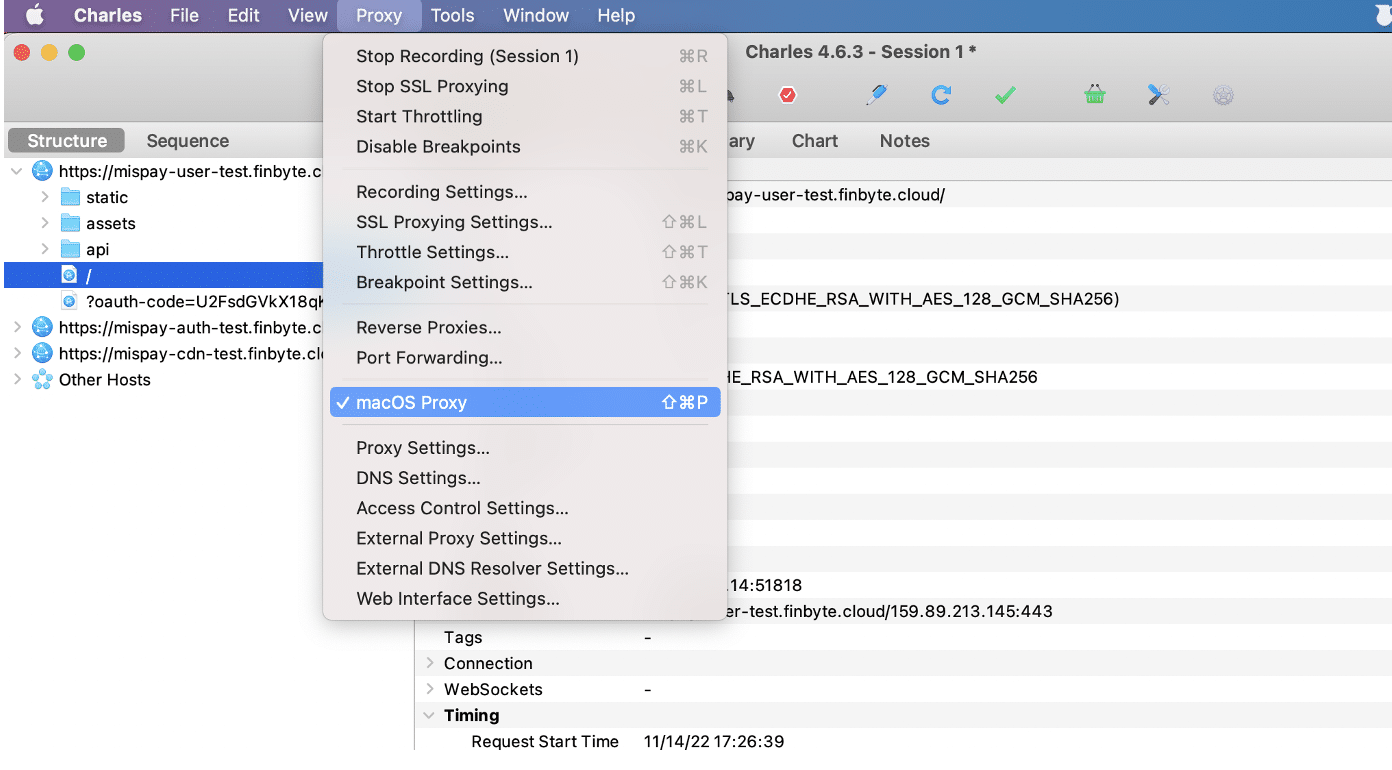
PS: Since all tabs in Chrome will be affected, System Proxy is opened instead of the selected profile when Charles is not needed.
Using Charles in Mozilla Firefox
- Mozilla cannot detect the SSL certificate via keychain and unlike Chrome, it has to do another action to use the SSL certificate.
- Download and install the certificate to Firefox.
- Make sure the Charles Proxy Certificate is trusted to identify websites.
- Firefox Preferences > Certificates > View Certificates > Authorities
- Select Charles Proxy CA from the Authorities tab of Certificate Manager.
- Or install manually with the import button.
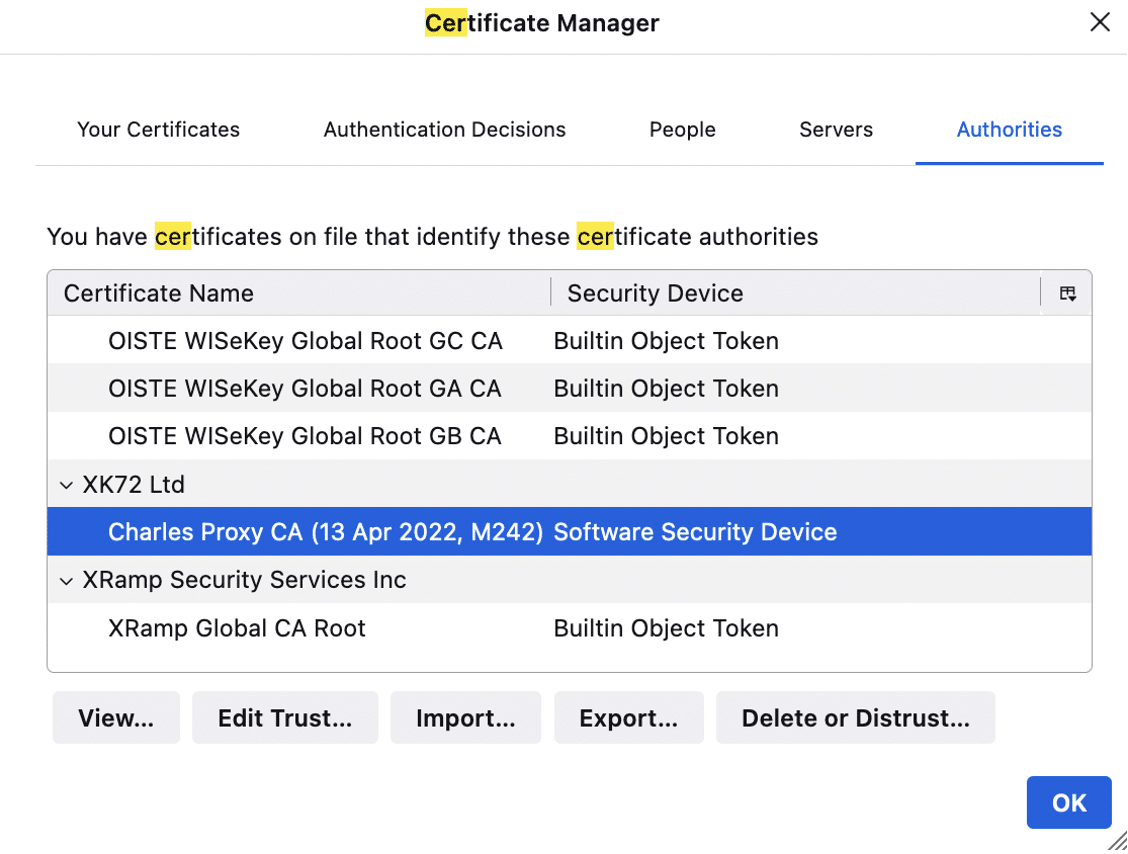
Proxy Settings On Mozilla Firefox manually
- Change the proxy settings to Manual Proxy Configuration.
- The address and port values we get from Charles-local IP addresses are entered in the HTTP proxy field.
- Click the Also use this proxy for HTTPS checkbox.
- Then enable MacOS Proxy from the Proxy menu of Charles Proxy.
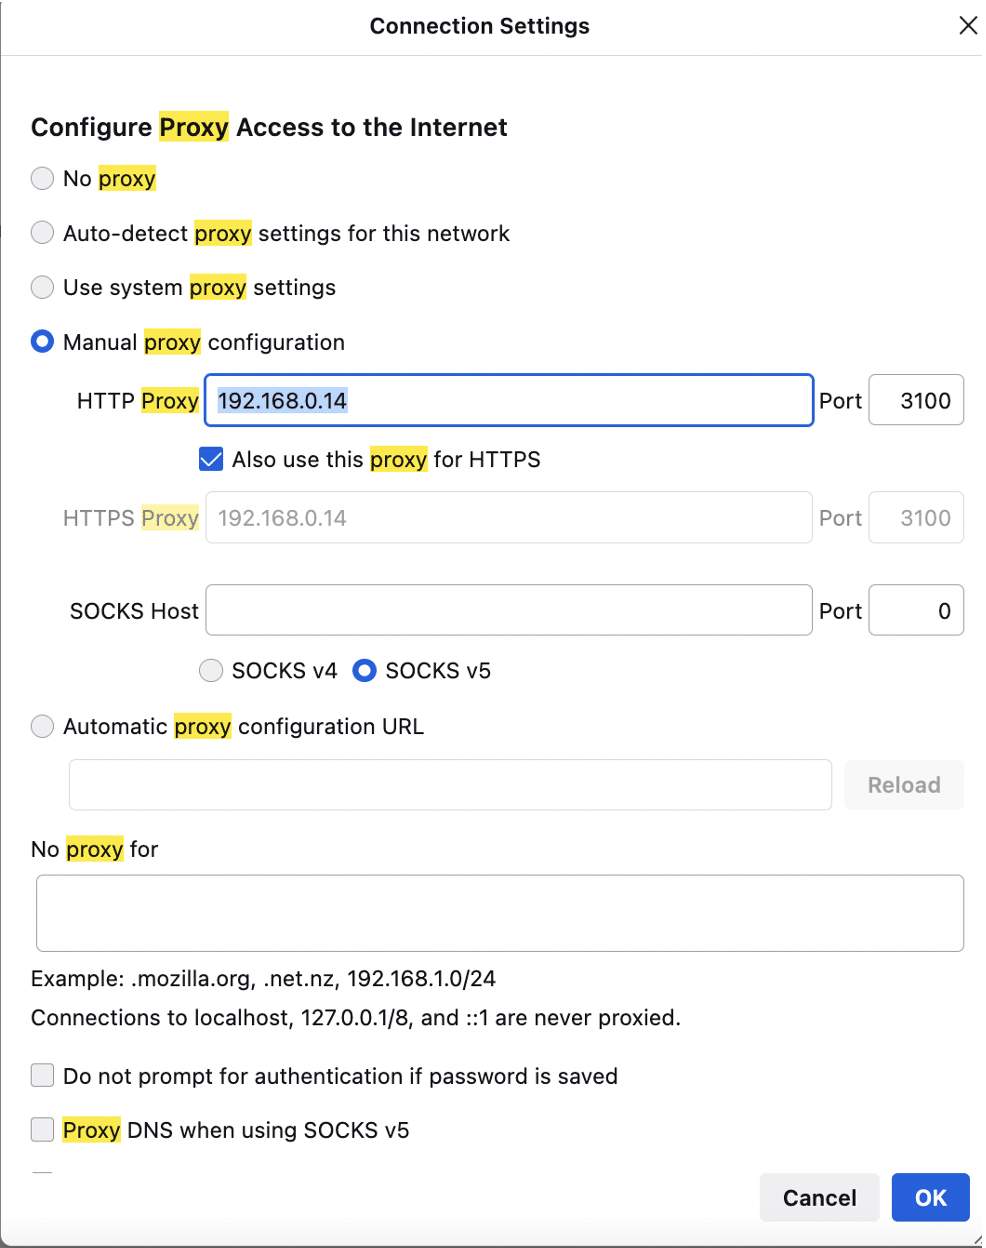
PS: Also with the Mozilla browser, you can add the SwitchyOmega extension and set the proxy as a chrome browser.
- Successfully Displaying Request and Response
- Enable SSL proxying.
- After establishing a connection between the app and Charles via proxy, the services are called disabled in Charles.
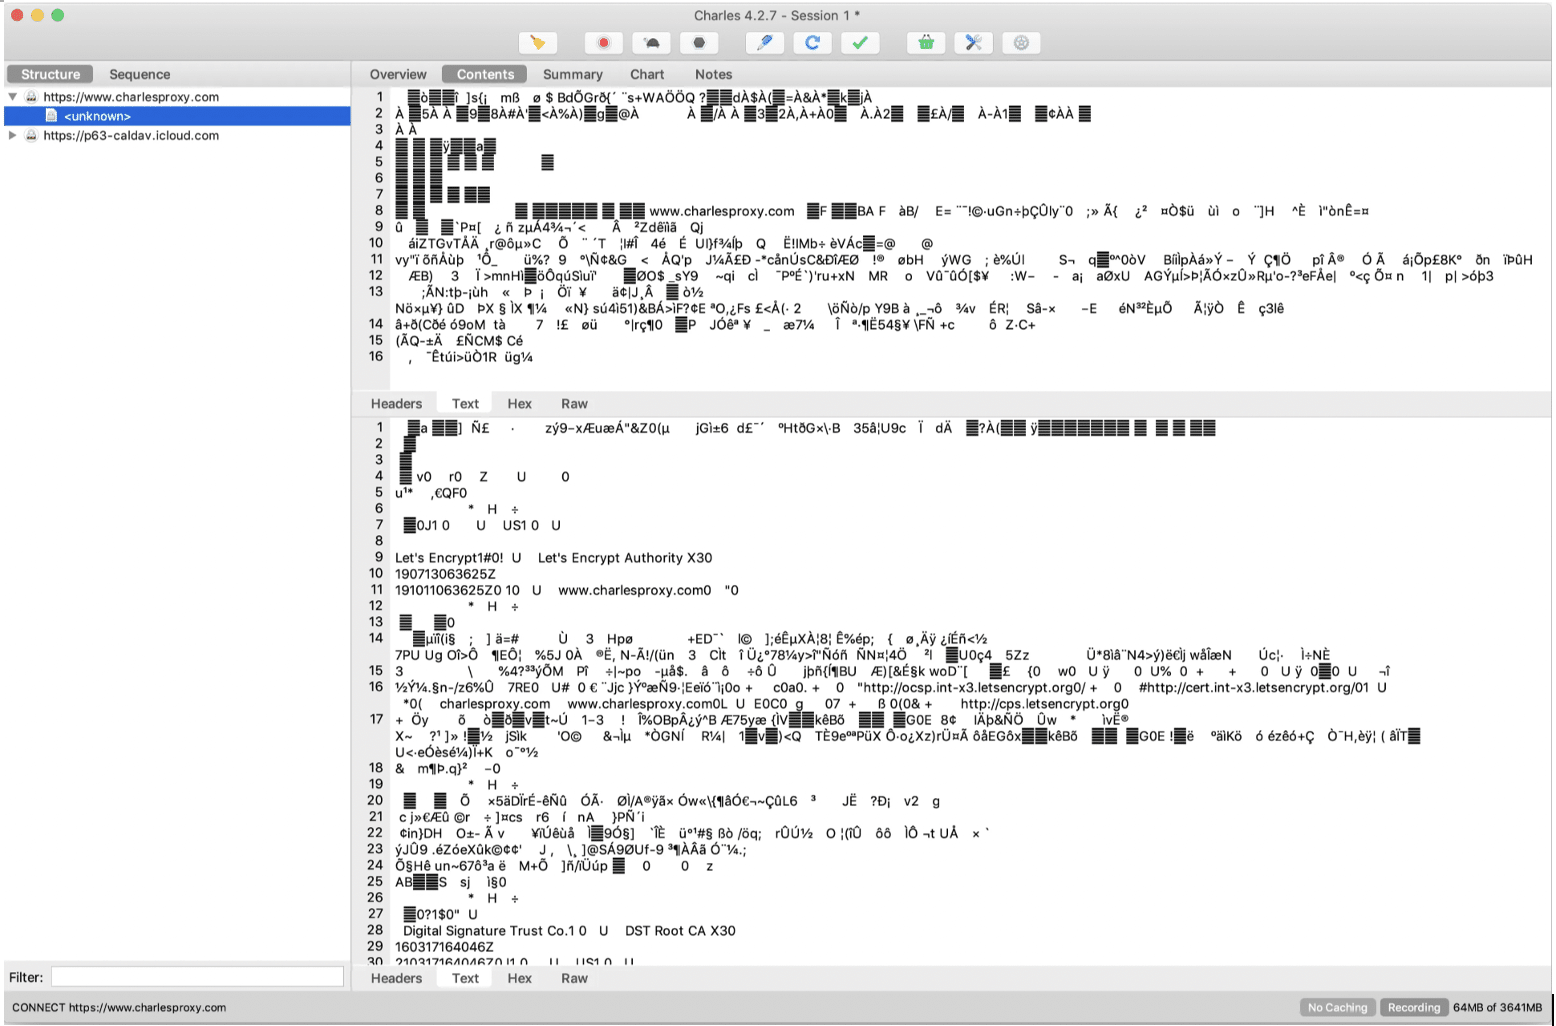
- Enable SSL proxying option must be turned on so that the contents can be observed/li>
After enabling SSL proxying, the content of the request and response should display successfully as below.
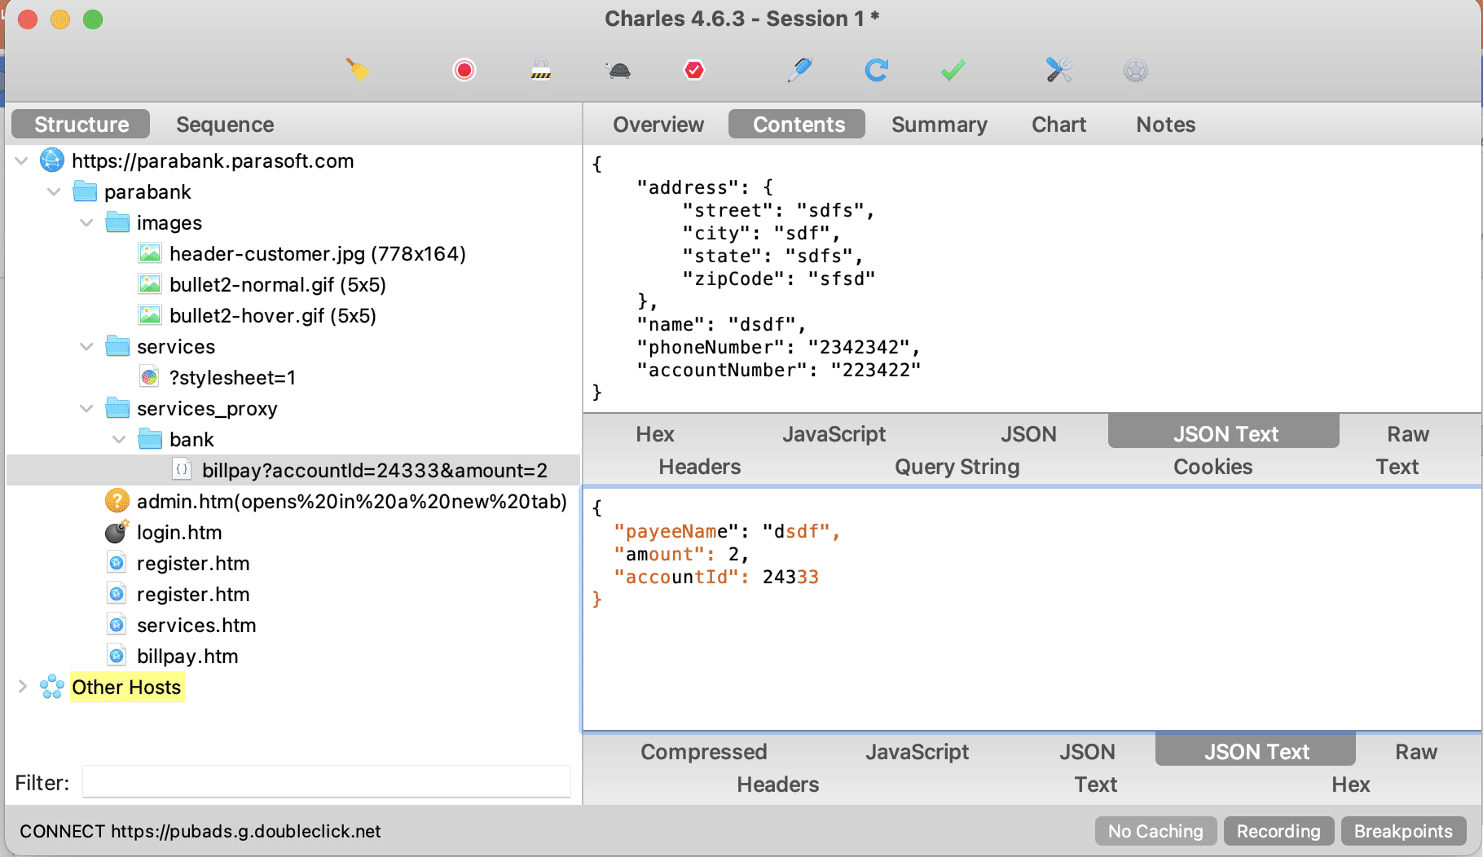
- The upper part is the request field, and the lower part is the response field. it in JSON text view.
- In the overview, we can access the URL information, status information, time interval of the request, and duration information of the service.
- We can control the error messages by sending different error codes with status.
- We also see the information returned from the service in the content area. We can see method information, browser information, etc. In the headers. We can also access token information and session information in cookies. Or we can see their cash status. In the Raw field, we can see the formatted version of the request.
- In response, we can see its status in the header again. There is a cookies section. Responses are formatted in text, hex, compressed and Javascript styles.
- It allows us to see in detail which requests are coming and sending in the background of the application.
Key Takeaways
Charles is comfortable to use, even if the setup process is difficult and multi-step. Sometimes, when certified services cannot be observed, you must have completed the steps I mentioned above. In this article, many problems that you may encounter with the Charles installation are mentioned. With the Switchyomega tool, you can quickly and easily change proxy settings in web browsers and focus on testing. Moreover, after making the extra settings required for the certificate in the Mozilla browser, you can use Switchyomega or manually change the proxy settings.
For the mobile side, it becomes easily usable after making the certificate settings for both iOS and Android and changing the proxy. If you have problems downloading and installing the certificate on the devices, it will be useful to review the relevant settings I mentioned above.
Thus, in cases where we need to keep the services confidential, we can keep our service contents confidential from external sources with certificates, and we can safely observe and edit requests and responses whenever we want.
For a deeper dive into the advanced features and applications of Charles Proxy, check out our second blog here.
Reading Time: 8 minutes
Don’t miss out the latestCommencis Thoughts and News.

Hilal Akaltun
QA Engineer


